Archive

Author Archive

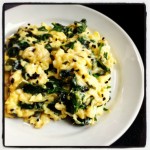
Seaweed Scramble

June 26th, 2013 3 comments

Ingredients:
1/4 cup Wakame Dried Seaweed
6 Egg
1 small can of mushrooms (optional)
Directions:
Soak seaweed in water for about 2 minutes, then rinse and drain
heat pan to med-high heat ( I use the green diamond pan, so I do not use any non stick spray) You may want to use coconut oil or coconut oil non-stick spray.
Add all ingredients and cook ’til eggs are done
That’s all folks. Delicious and nutritious.

Categories: Breakfast, Recipes Tags:

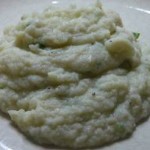
Basic Mashed Potato Alternative

February 25th, 2013 4 comments

Ingredients:

One large head of cauliflower

Two Tablespoons of Sesame seed oil or oil of your choice

Two Tablespoons of coconut flour

Unsweetened Almond Milk (add to desired texture)

half of one bulb of garlic, chopped

One can of Allen’s Purple Hull Peas

Directions:

Chop the head of cauliflower and garlic, drizzle with oil and roast.

Add cauliflower and garlic mixture, can of peas, coconut  flour, and almond milk to blender and blend until smooth. Add almond milk to desired consistency.  Enjoy!

Categories: Recipes Tags:

The Basics Approved “Rouxless” Gumbo

February 11th, 2013 3 comments

Sha, I am Serious

The first step of a gumbo is ordinarily the roux.  A combination of flour & cooking oil.  The exception to this is okra gumbo.  There is not the traditional roux but rather the smothered okra serves to thicken the gumbo.  Many seasoning choices are now available to spice this gumbo up.  I use the following:  salt, black pepper, cayenne pepper, Tony Chachere’s Original Creole Seasoning, and “Slap Ya Moma”.  With a large pot of gumbo it takes a lot of seasoning.  So don’t be afraid to pour it on.  I normally start with a little amount of it all and then taste test as the gumbo progresses.  Salt and both peppers are extremely important but don’t overdo them.  Taste as you go is my best advice.  And I usually just end of adding as I go more salt & Tony’s.  I don’t measure when I cook so I apologize ahead of time for that.  BUT, I am going to come to Austin & do a demonstration on this preparation J  that will make this easier.

Ingredients: to smother okra that will serve as the basis for thickening the gumbo

(2) 1 lb. bag of cut up frozen okra

(1) chopped up medium onion

(5) pieces of a pod of garlic chopped up

1 10 oz. can or diced tomatoes & green chiles

Vegetable Oil – since I don’t measure anything when doing this I can only say this:  pour enough oil to cover the bottom of the pot.

Meat choices:

To the smothered okra you can add any combination of these meats.

Chicken & Sausage:

Chicken – about 4 lb.  whole chicken cut up & skin removed (or 4 lbs. boneless chicken breast cut up – do not leave whole).

2 lbs. smoked sausage – cut into bit size pieces. Boil first in separate pot to get the grease out.  This takes about 20-30 minutes.

; You can add these seafood items to smothered okra for a rouxless seafood gumbo:

Shrimp (5 lbs.) or more

Oysters 1 or 2 pints (depending upon IF you like oysters to eat or if you just want to add a little extra flavor)

Crab meat   – 2 lbs. of white.

SMOTHERING THE OKRA – THE TRICKY PART

I smother the okra in cast iron dutch oven. The pot should be at least a 5 QT part to allow for the okra.  The cast iron definitely makes the okra have a color & taste associated with the pot.  BUT, any good heavy bottomed pot will work.  I have used magnalite.

Prep work: Cut up the onion & garlic;   open the can of diced tomatoes;  have a measuring cup with about 2 cups of water in it; cut open the bags of okra (well, duh)…well, maybe you would forget & have this hot oil going & it could catch on fire & you are done before you got started LOL

Pour enough vegetable oil to cover the bottom of your pot and put the fire on medium.  You want the oil to get hot (when you sprinkle water it splatters).  When the oil is hot you add one bag of okra at a time, stirring as you do this.  Now the fun begins…cause you gonna be stirring a LONG time…it may seem like forever…but YOU CAN DO IT!!  You work out with Ashly.  If you can do that you can stir de okra for de gumbo J  Seriously, you stir & stir.  You may have to turn your fire down after the okra starts cooking down.  The okra is going to start getting slimy looking – so disgusting.  You have to stir and as you stir you smash the okra to break it apart.  I use a small spatula (about 3” in diameter) to stir & smash with.  It is very important to NOT leave this while it is cooking down.  It will stick & burn…way too much work to let that happen.

At some point about 20 minutes into the stirring you will notice that the sliminess is easing up.  You now add the chopped up onion & garlic…continue stirring. When you can see that the onion is becoming translucent you add the diced tomatoes.  STIR STIR STIR STIR & STIR some more.

The entire time that you stir you are smashing the okra.  You should not see whole pieces of okra.

Add a small amount of water and add the following seasonings: salt, black & cayenne pepper & cracked red pepper.  Fire down & lid on.

Now go take some pain medication for the arm you were stirring with.

Watch the pot carefully, checking about every 5 minutes…I usually read something in the kitchen while cooking this.  It can & will stick/burn.  Continue to stir & chop with spatula.

It takes about an hour to complete this process.

Now you can add water.  If you cooked in a 5 QT pot you will need a larger pot to add water to…a soup size pot.

Turn the fire up & add about 5 cups of water.  Better less than too much.  When you add water the liquid should not be thin like broth a little thicker.

After adding water you add the seasonings again:  salt, black pepper, & Tony’s original.  Bring this to a low boil & let cook about 45 minutes.  Taste & if necessary add more seasonings.

After about 30 – 45minutes add the cut up chicken.  Let the chicken cook about 45 minutes, and then add the sausage.  After about 20 minutes check to see if the chicken is done.

At the end add 2 bunch of chopped up onion.  Let them cook about 5 minutes….enjoy!

For seafood gumbo you add everything @ once & it takes about 20 minutes to be done.

Laizze Les Bon Temps Rouler!!!!   By Liz Moss Fontenot, Ashly Dunn’s Proud Momma

Categories: Recipes Tags:

Homemade Toothpaste Recipe

January 12th, 2013 1 comment

Homemade Toothpaste Recipe

  • 2 Tbsp. coconut oil
  • 2 Tbsp. baking soda
  • 2 Tbsp. or desired consistency Aloe Vera Juice
  • 2 Tbsp. calcium magnesium powder
  • 2 Tbsp. xylitol or green stevia powder (optional)
  • 2 tsp. real sea salt (optional)
  • 20 drops essential oil (I use cinnamon.)
  • 10 drops trace minerals

Mix all ingredients together and store in a travel size squeeze bottle (typically used for lotions, I found mine at Whole Foods in the health and beauty section) or any type of small jar ( a baby food jar would work)

You can follow your brushing with a peroxide rinse: one cap of peroxide mixed with one cap of water, swish and spit!

Categories: Lifestyle Tags:

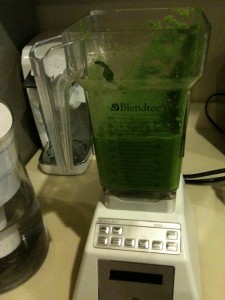
Detoxifying Green Mush

November 19th, 2012 No comments

Ingredients:

4-5 Green Zucchini

4 stalks of celery

1/2 – 1 inch fresh ginger

One bunch of flat leaf parsley

A sprig of mint

1 teaspoon of black pepper

1/2 cup organic cottage cheese or plain Greek Yogurt

Directions:

Blend first 5  ingredients

Serve on top of either cottage cheese or yogurt and sprinkle with pepper

Categories: Breakfast, Recipes Tags:

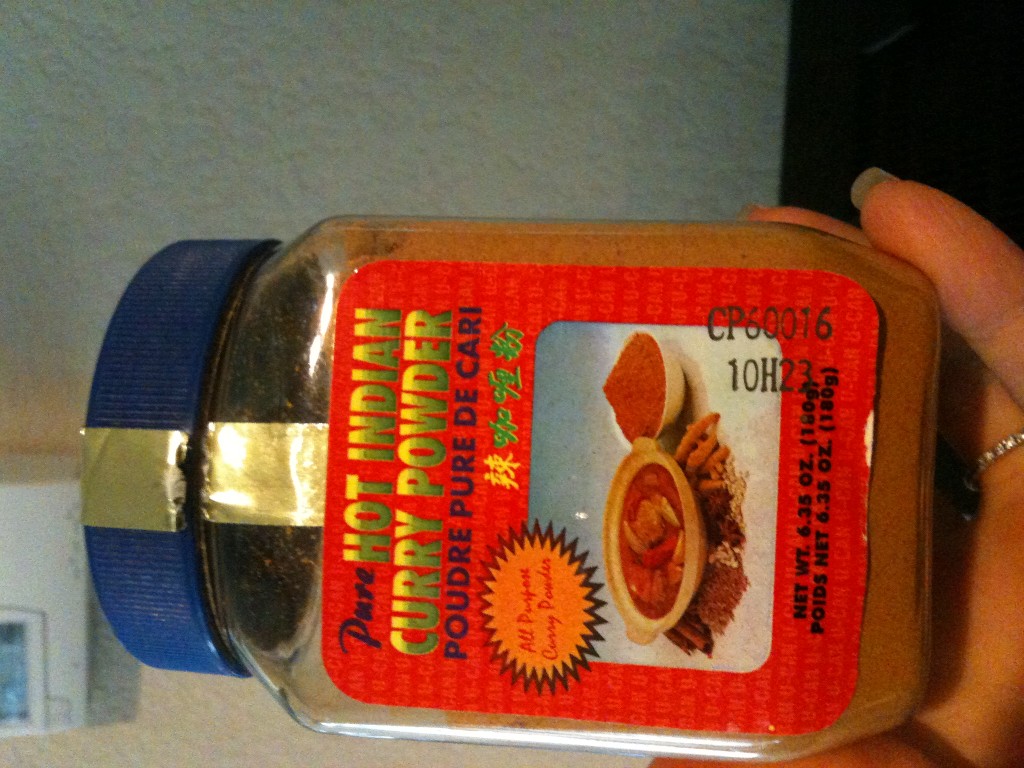
Spicy Indian Curry Eggs

November 14th, 2012 No comments

Serves  2

Ingredients:

1 teaspoon of ghee

handful of chopped kale

handful of baby spinach

6 eggs

half of an avocado

1 tablespoon of  hot Indian curry powder

a pinch of sea salt

Directions:

  • over medium heat start to melt  ghee in a skillet on the stove top
  • add Kale and cook until tender
  • whisk eggs and add to kale
  • immediately after eggs, add spinach
  • add curry spice and sea salt

scramble in skillet ’til done and top with avocado

Categories: Breakfast Tags:

The Evolution of Cheat Day and All You Need To Know About Gluten

October 7th, 2012 6 comments

A little over a year ago I set out to learn all that I could about ancestral health. I read a few books, a million blogs, and spent many hours doing internet research. The Caveman Diet, The Hunter Gather Diet, Paleo, Primal, Anti-inflammatory, Anti-aging– all of these diets  made a lot of sense to me and have at least one thing in common– how our ancestors ate, in turn setting the stage for our genetic make-up.  I created a way of eating, for myself, my family, and anyone else who was interested  based on  the many things that  I learned all based in  ancestral health.  Over the last 16 months I have gained so much knowledge  about how sugar, grains (which includes gluten), and dairy  effect the human body. I put the research to work.  As part of my new  routine, I  was given  one cheat day a week. On this  day I was allowed to eat anything and everything that I wanted after breakfast.   This idea, given to me by Tim Ferris, author of a fantastic book, The Four Hour Body, was brilliant! When you eliminate grains, sugar, and dairy from your diet you quickly also  eliminate most things that we, as Americans, keep as staples in our diets.  Understandably, at first, you feel pretty deprived. That’s where cheat day comes into play.   Knowing that  cheat day is  right around the corner  helps tremendously to  keep you on the straight and narrow. I don’t think I would have been able to get  where I am today without the security blanket of cheat day at the beginning.  Although, I had my doubts–at first I was actually scared of cheat day.  I thought I would ruin my whole week of clean eating in one day.  However, I really believed  in the science that backed the idea of  this awesome day.  In doing many experiments, Tim Ferris  figured out that spiking caloric intake once a week (when sticking to this said plan all other 6 days of the week)  actually boost metabolism through a host of hormonal changes.  I was convinced, so  I set out to eat clean and have my cheat day too. Weeks and  then months went by and big changes happened to my physical and emotional self.  As time continued on,  I stopped wanting those really bad junk foods on cheat day. So,  here I am, 16 months later happily  letting go of my security blanket known as cheat day.  My cheat days used to consist of doughnuts, pizza, hamburgers and fries, ice cream– lots of ice cream! and a slew of whatever else  I could get my hands on. Most of the time, by the end of the day, I was totally sick.  Even so, every week, I went back for more because It was awesome  knowing  that I could do that and seemingly  NOT ruin all  my hard work.  It also allowed me to eat  “normal” around others   and at social gatherings as I transitioned to this new way, even if it was for just one day.  The option was nice. It served its purpose– brilliant! Cheat day  got me through those tough weeks and months  at the beginning of this huge change that if I would not have had I would not be in the excellent health I am in  now. I would not recommend going about this transition any other way, unless you are just a glutton for punishment.  I have now been sugar, grain, and dairy free for about 80% of the last 16 months and it feels better than anything I have ever done for myself.     Oh! how cheat day has evolved.  Here I am, having gluten free hot cereal with an apple in place of doughnuts and ice cream  on “cheat day.” I don’t really care so much  about all that junk food I used to want on cheat days in the past.  I’m over it, my body did what it was supposed to do, it  has adjusted to this clean diet– i just don’t crave those terrible junk foods anymore.  That being said, don’t get it twisted, every blue moon I want pizza and doughnuts and I have been known to indulge, just not on a weekly basis anymore.  Amen!  Now, lets touch on gluten.  It’s super trendy right now to be “gluten free.” I saw a program on the news this morning that was “debunking” the myths on gluten. It did hardly that.   As in usual TV fashion, they  danced around the subject.  Most unsuspecting viewers would have probably walked away with the wrong message. However,  I will say that  the media is starting to report  on  all of this new science, but unfortunately  they are not fully there yet.     The  long story short is that gluten is bad. Why?  It is derived from wheat, barley, and oats in which we, as humans, were not made to digest.  Some people have a severe reaction to gluten, other wise known as an allergy, where as  others show no physical signs of an allergy; but that does not mean it is not harming you.  This is the jist of  what I have learned: Grains, which include wheat,barley and oats, among other bad things cause inflammation levels  to rise in the body which in turn  causes uric acid levels to rise.  Over time, this becomes a breeding ground for cancer, diabetes, heart attack, stroke, gout, and arthritis to name a few.   Over many years of bombarding your system with not only grains ( to include gluten) but  sugar,  and dairy products as well, on a regular basis, keeps your body inflamed and puts you at a higher risk to develop these popular diseases. Food manufacturers are jumping all over this by stocking the grocery store shelves with gluten free foods.  There are a few  problems with most of these foods; they are packaged  processed foods, they are usually  higher in calories than the regular gluten ridden ones, and loaded with carbohydrates.  Carbohydrates affect your body in the same way sugar does; it  causes inflammation, that we are trying to stay   away from, to rise.  My advice is to stick to anti-inflammatory  foods six days a week and allow yourself one cheat  day  with the long term goal in mind to become adjusted and not need that security blanket of cheat day any  longer.  Here are some examples of anti-inflammatory foods: Meat, fish, veggies, nuts and seeds, dark berries, dark beans,  and plain Greek yogurt.  Slow and steady wins the race!

Categories: Lifestyle Tags:

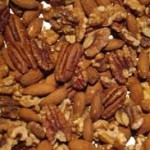
Roasted Nuts

July 10th, 2012 No comments

Ingredients:

  • Any and all  of the nuts and seeds that  you like! You do want to start with raw and unsalted nuts/seeds.
  • Any of the following oils:   coconut or avocado
  • Any or all of the following seasonings:

Cinnamon, sea salt, peppers,  turmeric, cardamon, ginger,cumin, chili powder, cloves, nutmeg, curry powder, stevia powder for sweetness

I like the following combinations:

Sweet and Spicy:

cinnamon, ginger, cloves, nut meg, sea salt, Cayenne pepper, stevia powder

Tex Mex Mix:

sea salt, chili powder, cumin, cayenne, fresh squeezed  lime

Spicy Indian:

ginger, cardamon, turmeric,cayenne pepper, sea salt, curry powder

Directions:

Place nuts and seeds in a bowl large enough to cover them in water. Allow nuts and seeds to soak for at least 4 hours, I usually soak mine over night. Once you are done soaking, strain and rinse them.  Pre heat oven to 200 degrees, drizzle oil over nuts, place them in a single layer on a cookie sheet and roast for about 2 hours. After roasting is done, add seasonings and enjoy!

Categories: Breakfast, Desserts, Recipes Tags:

Smothered Sausage and Eggplant

July 5th, 2012 5 comments

Ingredients:

  • Fresh sausage sliced into “chips”, 1lb.
  • one large  eggplant, sliced into chips
  • Low sodium chicken or veggie broth, 1/4 cup
  • no salt added diced tomatoes, 1 can
  • no salt added tomato sauce, one small can
  • diced green chiles, one small can
  • diced jalapeno’s, one small can
  • frozen fajita veggies, one small bag
  • frozen baby Lima beans, one small bag
  • fresh parsley, a few sprigs

Season to taste with:

  • sea salt
  • herbs de Provence
  • basil
  • black pepper
  • red pepper flakes
  • onion powder

Directions:

Cook Lima beans according to bag. In a sauce pan, first,  sprinkle the sausage with onion powder, red pepper flakes, black pepper, and herbs then brown the sausage. Remove from heat and transfer into a large pot. In the same sauce pan that you browned the sausage, sprinkle with seasonings, add broth and  brown the eggplant til it’s tender. Transfer the eggplant to the big pot of sausage, add canned items, fajita veggies, Lima beans (once they are done cooking as per package directions) and sprinkle more of all of the seasonings. Cover and cook for about 25 minutes on low or until sausage is cooked all the way through. Enjoy!

Categories: Recipes Tags:

Low Carb Cheesecake

July 4th, 2012 No comments

Crust Ingredients:

  • 2/3 cup ground almonds
  • 1/3 cup coconut oil
  • ¼ tsp sea salt
  • 1 tsp. Sugar equivalent  (coconut crystals, splenda or stevia)
  • 1 Tbsp sea salt
  • 2 tbsp cold water

Directions:

  1. Preheat oven to 350 F
  2. Combine all ingredients except water
  3. Gradually add water to thicken dough
  4. Press into pie plate
  5. Pre-bake approximately 10 minutes, while arranging filling, or until lightly browned
Filling:
  • cream cheese, 3 packages about 36oz.
  • sugar equivalent, 1 1/4 cups
  • eggs, 4
  • lemon juice, 1/4 cup (to boast flavor, I’d recommend fresh lemon juice)
  • heavy cream, 1/4 cup
  • Buttermilk, 1/4 cup
Directions for filling:
Allow all ingredients to come to room temperature
Beat the cream cheese to soften it, then add the  sugar alternative, beating again to combine. Next,  Beat in the eggs,lemon juice, vanilla, heavy cream,  buttermilk and mix to a smooth batter.
Bake in a 350 degree  preheated oven  for 45 minutes to an hour. Check it with a toothpick.  When  your toothpick comes out of the center  clean, it’s ready. Allow it to cool and  then place it  in the refrigerator over night for best taste.   Serve with fresh blueberries, blackberries or raspberries and a little bit of pure cream whipped topping.
Categories: Desserts, Uncategorized Tags: